

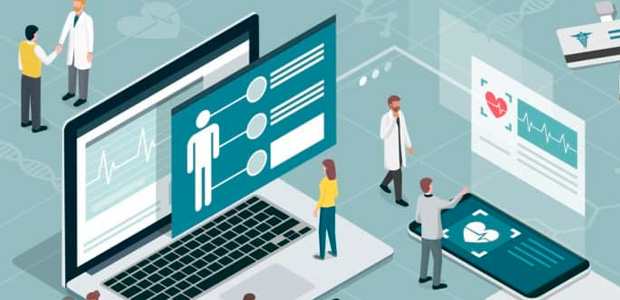
Electronic health records (EHRs) have become an indispensable part of healthcare operations. EHRs allow providers to store patient information electronically and share it securely. However, to transmit claims and other data to payers, providers need to connect their EHR system to a clearinghouse.


A clearinghouse acts as an intermediary between providers and insurance companies by formatting data so it can be processed properly on both ends.
Connecting an EHR to a clearinghouse properly can optimize workflow, reduce claim rejections, and facilitate faster reimbursements. However, the process can seem daunting if you don’t know where to start. We’ll walk you through the steps of choosing, implementing, testing, and using a clearinghouse connection.
Choosing a Clearinghouse
The first step is selecting a clearinghouse that meets your practice’s needs.
Here are some key factors to consider during your search:
Clearinghouse Compatibility
The clearinghouse must be compatible with your EHR system. Most major clearinghouses support connections with all popular EHRs. However, it’s important to verify compatibility to avoid any integration issues.
You’ll also want to ensure the clearinghouse works with all payers you routinely submit claims to. Check which payer connections and payer-specific services each clearinghouse offers.
Cost
Compare the pricing models of different clearinghouses. Some charge per transaction fees while others have monthly or annual subscription plans. Consider transaction volume to determine the most cost-effective option.
Also find out if there are any setup, training, or maintenance fees. Factor these into the total cost estimate.
Reviews and Recommendations
Research online reviews and talk to other practices using the clearinghouse. This will give you insight into the quality of customer support as well as any potential pain points during implementation or usage.
Your existing EHR vendor may also recommend partner clearinghouses that integrate seamlessly. This option eliminates the need for custom interfaces.
Features and Services
Consider the additional features each clearinghouse provides. For example, some offer claim scrubbing to catch errors before submission. Others provide robust reporting for tracking rejections and denial trends.
Make sure the clearinghouse has tools to support any specialized billing needs like worker’s compensation claims or coordination of benefits. Services like remittance management can also help streamline workflows.
Data Security and Compliance
Don’t forget to vet the clearinghouse’s security standards and protocols. HIPAA compliance is a must but additional safeguards like data encryption are even better.
By evaluating these factors, you can narrow down the clearinghouse options to the one that best suits your practice’s requirements.
Implementing the EHR-Clearinghouse Interface
Once you’ve selected a clearinghouse, it’s time to implement the integration between your EHR system and the clearinghouse.
Here are the typical steps involved:
Planning
Create an implementation plan and timeline in collaboration with the clearinghouse and your EHR vendor. Identify any modifications required on your end and the resources needed for implementation.
Determine the testing process, training schedule, and launch date. Account for factors like staff availability and workload to set realistic timelines.
Establishing Connectivity
Work with your clearinghouse and EHR vendor to establish the technical interface between the two systems. This usually involves installing adapter software within your EHR.
The clearinghouse may also provide an API or autres that facilitates seamless data transfer. Follow all protocols for safely opening external connections in your EHR system.
HL7 and Interoperability
A key component in connecting an EHR and clearinghouse is establishing interoperability between the two systems. This allows seamless data exchange to occur. HL7 or Health Level 7 refers to a standardized framework for this type of health data integration. It provides specifications for clinical and administrative data transactions.
Clearinghouses will typically support integration using HL7 messaging standards. When configuring an interface, HL7 configurations will need to be set up appropriately on both the EHR and clearinghouse ends. This involves mapping the HL7 data fields between the two systems accurately. HL7 messaging helps transfer patient claims data from the EHR to clearinghouse API automatically without manual entry. It also enables the clearinghouse to return reports and other transaction data back to the EHR system.
Proper implementation of HL7 standards is crucial for true interoperability between the EHR and clearinghouse. It eliminates human errors that could occur with manual data transfers. HL7 capabilities allow the two systems to ‘talk’ to each other and exchange information seamlessly. This powers automated workflows that save time and money for healthcare providers.
Configuring Transmissions
Set up the clearinghouse connection settings within your EHR’s billing or practice management module. Enter details like your clearinghouse account number and define the frequency of batch claim file transmissions.
Map data fields between your EHR and clearinghouse so information transfers accurately between the two. Follow specifications provided by the clearinghouse.
Testing
Conduct extensive tests on the new interface, first using demo patient data. Verify claims are accurately transmitted and reports are properly received. Repeat testing until all issues are resolved.
Next, pilot the system with real patient claims and monitor each step of the process. Only proceed to the next phase after complete testing in a contained environment.
Going Live
Once testing is successful, roll out the new clearinghouse connection practice-wide. Schedule ample training so staff understand the workflow changes. Start with lower claim volumes and slowly scale up each day.
Closely track performance and monitor for any new issues. The clearinghouse should help with troubleshooting during the initial go-live period.
Optimizing the Clearinghouse Connection
The implementation is complete but optimizing the clearinghouse connection is an ongoing process.
Follow these tips to maximize performance:
Regularly Review Reports
Use the payer acceptance and rejection reports from the clearinghouse to identify recurring issues. Update EHR workflows to minimize rejections.
Analyze denial patterns to appeal denials and improve documentation. Reports also help reconcile payments and claims statuses.
Monitor Transaction Speed
Slow data transfers or processing indicate a technical issue. Work with your clearinghouse to diagnose and address the problem immediately to avoid claim delays.
Determine if factors like staff usage or transmission batches are impacting speed. Stagger batch schedules and allocate resources accordingly.
Keep Software Updated
Install the latest updates for your EHR software and any clearinghouse integration tools. Updates often fix bugs impacting connectivity.
Coordinate with the clearinghouse so updates on either system happen in sync. Mismatched versions can cause unexpected integration failures.
Refine Data Mapping
Regularly review the claim data mapping between your EHR and clearinghouse. Update configurations if you’ve added procedure codes, new providers, or enrollment with different payers.
Inaccurate mappings lead to denied claims so keep them current as changes occur on either end of the connection.
Train Staff
Conduct periodic training sessions so staff remains fluent in using the clearinghouse connection and interpreting reports. Clarify any policy or workflow changes.
New staff members should receive comprehensive training during onboarding. Assign training refreshers as needed for existing employees.
Key Benefits of Connecting an EHR and Clearinghouse
Connecting your EHR with a clearinghouse optimizes the claims management lifecycle in the following ways:
- Fewer rejections – Clearinghouses scrub claims according to payer rules before submitting them for processing. This improves acceptance rates and cash flow.
- Faster payments – Electronic submissions through a clearinghouse speed up claims processing. Automating follow-up on outstanding claims also accelerates reimbursement.
- Improved data accuracy – Data mapping ensures information transfers correctly between systems. There’s less need for manual data entry or adjustments.
- Better analytics – Detailed reports provide actionable insights to boost revenue and resolve issues early. You can manage denials more effectively.
- Increased efficiency – Workflows are streamlined through automation. Staff spends less time on manual claim preparation, submission, and reconciliation.
- Enhanced compliance – Clearinghouses keep protocols updated as regulations change. This reduces compliance failures and penalties.
- Scalability – As your practice grows, a robust clearinghouse connection easily accommodates increased transaction volumes without compromising speed or accuracy.
Summary: How to Connect an EHR to a Clearinghouse
Connecting an EHR with a clearinghouse requires careful planning and gradual implementation. However, the effort pays off through reduced administrative costs, faster payments, and better analytics. Maintaining an optimized interface saves time and money while also improving staff productivity and the patient experience.
With this comprehensive guide, you can ensure your EHR-clearinghouse integration checks all the boxes for functionality, security, and performance. Leveraging clearinghouse technology provides a scalable foundation for managing billing as your practice evolves. Most importantly, it enables you to focus on delivering quality care rather than back-office administration.
